 Rust Code Lock
 Code Lock Rust
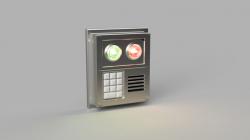 Code Lock Rust
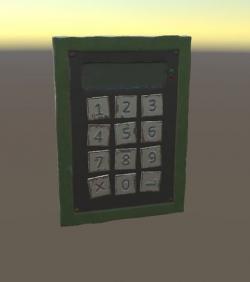 Code Lock 3D model
 Code Lock 3D model
 Code lock 3D model
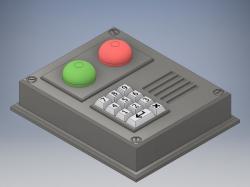
Understanding Rust Code Lock 3D Models
‘Rust’ is a survival game renowned for its realistic and immersive gameplay, including the use of code locks for securing players’ bases. Replicating these in the real world as 3D models can be both a fun project and a challenge.
Finding Models and Resources
The first step is sourcing the 3D models. Websites like Thingiverse and Cults3D are treasure troves for 3D printing enthusiasts, offering a range of models, including rust code lock designs. These platforms allow users to download models, often for free, which can then be printed using a 3D printer.
Printing Considerations
When it comes to 3D printing these models, several factors come into play:
- Material Choice: The choice of material can significantly impact the final product. PLA and ABS are common choices due to their ease of use and durability.
- Printer Settings: Optimal printer settings such as layer height, infill, and supports are crucial for a successful print.
- Post-Processing: After printing, some post-processing like sanding and painting may be required to give the model a more realistic and finished look.
How to 3D Print Rust Code Lock Models
3D printing a rust code lock model involves several steps:
- Model Selection: Choose a model from a 3D printing website and download the STL file.
- Slicing: Use slicing software to prepare the model for printing. This involves setting parameters like layer height and infill.
- Printing: Load the material into the 3D printer and start the printing process.
- Post-Processing: Clean and finish the model. This may include sanding, painting, or assembling multiple parts.
Q&A on 3D Printing Rust Code Lock Models
What is the Best Material for Printing Rust Code Lock Models?
PLA is recommended for beginners due to its ease of use and low warp. For more durability, ABS can be used, but it requires a heated bed and well-ventilated area.
Can I Modify the Design of the Model?
Yes, you can modify the design using 3D modeling software. This allows you to customize the model to your preferences.
Do I Need Supports While Printing?
It depends on the model. If the model has overhangs or complex geometries, supports may be necessary to ensure a successful print.
How Long Does It Take to Print a Rust Code Lock Model?
The printing time can vary based on the size of the model and printer settings. Smaller models may take a few hours, while larger or more detailed models can take longer.
Is Post-Processing Necessary?
Post-processing, like sanding and painting, is optional but can significantly enhance the appearance of the model.
In summary, 3D printing rust code lock models is a fantastic project that blends gaming culture with the technicalities of 3D printing. It’s a process that allows for creativity, customization, and the joy of bringing a digital concept into the physical world. Remember, the key to a successful 3D print lies in careful planning, precise printing, and a bit of creativity in the finishing touches. Happy printing!