 rocktopus
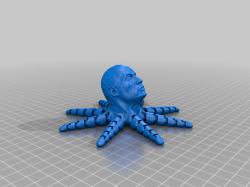 Rocktopus
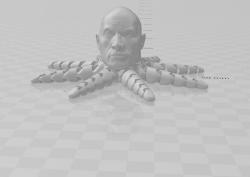 Rocktopus
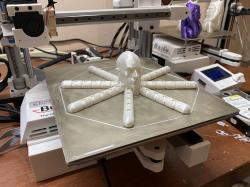 Rocktopus
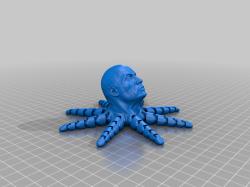
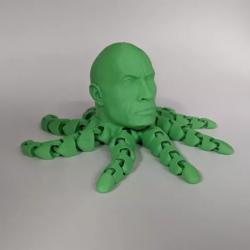 The Rocktopus
 Rocktopus 2022
Design and File Preparation
Creating a Rocktopus begins with a thoughtful design and file preparation:
- Optimization: Designs need to be tailored for FDM (Fused Deposition Modeling) printing. It’s important to avoid complex geometries or overhangs that require extensive support structures.
- Customization: Add personal touches to your Rocktopus. This could range from embedding initials, altering textures, or experimenting with different patterns.
- Scaling: Ensure the design fits within your printer’s build volume. Adjust the scale according to your printer’s capabilities and the desired final size of the model.
Software Choices
Selecting the right software can significantly impact your 3D printing experience. Two notable options are Cura and PrusaSlicer. Both are known for their user-friendly interfaces, making the slicing process accessible. They come with preset profiles for various printers and materials, simplifying the setup. Additionally, both have active online communities, providing a wealth of knowledge and support.
Printer Settings for Optimal Results
Fine-tuning your printer settings is crucial:
- Layer Height and Print Speed: A layer height of 0.2mm balances detail and speed. Print speeds around 50mm/s are recommended for better print quality.
- Supports and Adhesion: While Rocktopus designs often don’t require extensive supports, some parts might need minimal support. Using a brim or raft can enhance bed adhesion, which is vital for models with smaller footprints.
- Temperature Control: Set the extruder temperature according to your filament type. For PLA, a range of 190°C to 220°C is typical.
- Infill: An infill of around 20% offers a balance between strength and material efficiency.
- Retraction Settings: Proper retraction settings are key, especially for intricate parts like the tentacles, to avoid stringing.
Post-Printing Tips for Your 3D Printed Rocktopus
After printing, some post-processing steps can enhance the appearance and quality of your Rocktopus:
- Cleaning and Removing Supports: If supports were used, remove them carefully to avoid damaging the print. Tools like needle-nose pliers or tweezers can be helpful.
- Smoothing: For ABS prints, an acetone vapor bath can smooth out layer lines. For PLA, gentler methods like sanding are recommended.
Q&A
Let’s address some common questions about 3D printing Rocktopus models:
Q: What material is best for printing a Rocktopus? A: PLA is a popular choice due to its ease of use and low temperature requirements. ABS can also be used, especially if you plan to smooth the print with an acetone vapor bath.
Q: Can I print a Rocktopus on any 3D printer? A: Yes, as long as the build volume of your printer can accommodate the size of the Rocktopus model. Adjust the scale of the model if necessary.
Q: How long does it take to print a Rocktopus? A: Print time can vary based on the size of the model, the layer height, and the print speed. Smaller models with standard settings may take a few hours.
Q: Do I need to use supports for printing a Rocktopus? A: It depends on the design. Many Rocktopus models are designed to print without extensive supports, but check for any overhangs or complex features that might require them.
By following these guidelines and tips, you can successfully create your own Rocktopus, adding a fun and unique piece to your 3D printing collection. Remember, the key to a successful print lies in careful preparation, precise settings, and a bit of creativity!