 3D printed Coin Sorter
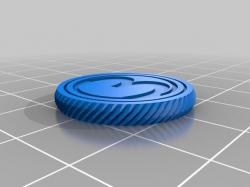 3D Printed Coin Tokens
 3D Printed Coin Shuffleboard
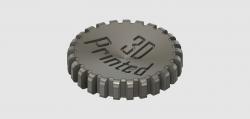 3D Printed Coin
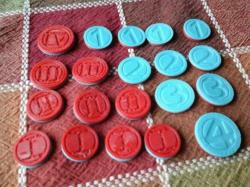 3D Printed Coin Tokens
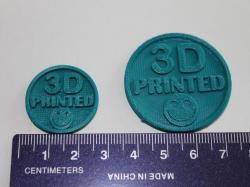 3D Printed Coin
The Variety of 3D Printed Coin Models
3D printed coins come in various forms, showcasing an impressive array of designs. Platforms like CGTrader provide access to a multitude of models, including replicas of ancient coins, thematic coins from popular culture, and even intricate designs like the Ethereum logo or unique pieces like the Cuban Link Chain Ring. These models cater to a wide range of interests, from history buffs to pop culture enthusiasts, offering something for everyone.
Printing 3D Coin Models: A Step-by-Step Guide
Printing a 3D coin involves several steps, each crucial for achieving a high-quality result. Here’s a simplified breakdown:
- Choosing the Right Model: First, select a coin model that suits your interest. Sites like CGTrader offer a plethora of options, from historical coins to creative designs.
- Preparing the File: Ensure the file is compatible with your 3D printer. Common formats include STL, OBJ, and FBX.
- Setting Up Your Printer: Adjust your printer settings based on the material you’re using. For coins, a finer resolution might be necessary to capture the details.
- Printing: Load the filament and start the printing process. This can take anywhere from a few minutes to several hours, depending on the complexity and size of the coin.
- Post-Processing: After printing, you might need to remove supports, sand the coin, or even paint it for a finished look.
Tips for Successful 3D Printing of Coin Models
- Material Choice: For coins, materials like PLA or ABS are popular choices due to their ease of printing and detail resolution.
- Printer Calibration: Ensure your printer is well-calibrated to achieve the fine details that coins usually have.
- Layer Height: Opt for a lower layer height for finer detail, but be prepared for longer print times.
- Supports: Carefully plan the placement of supports to avoid damage to the coin’s face during removal.
Q&A: Common Questions About 3D Printed Coins
- Q: Can any 3D printer print coin models? A: Most FDM and SLA printers can print coin models, but the level of detail depends on the printer’s capabilities.
- Q: How long does it take to print a 3D coin? A: It varies based on size and detail, but generally, it can take from 30 minutes to a few hours.
- Q: Can I paint my 3D printed coins? A: Yes, acrylic paints work well on materials like PLA and ABS.
In conclusion, 3D printed coins offer a unique blend of history, art, and technology, making them fascinating projects for 3D printing enthusiasts. Whether you’re a novice or a seasoned printer, the process of creating these miniature treasures is both rewarding and educational. Remember, the key to a successful print lies in meticulous preparation and patience. Happy printing!