 Welding Helmet 3D model
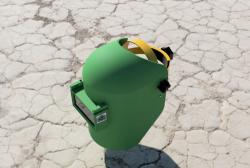 welding helmet
 Welding Helmet Low-poly 3D model
 Welding Helmet Low-poly 3D model
 Welding Helmet
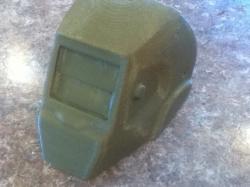 Welding Helmet
What Are Welding Helmet Fan 3D Models?
Welding helmet fan 3D models are digital blueprints used to create fan attachments for welding helmets using a 3D printer. These models can range from simple designs to more complex, multi-component systems. They are typically available in file formats such as STL, which are compatible with most 3D printers.
Finding and Downloading Welding Helmet Fan 3D Models
The first step in creating a 3D-printed welding helmet fan is to find a suitable 3D model. Websites like STLFinder offer a variety of models, some free and some paid. When choosing a model, it’s crucial to select one that fits your helmet and meets your specific needs. For example, you may find models like the DIY Welding Helmet Ventilation, PAPR adapter, or specific models designed for certain helmet brands.
Once you’ve selected a model, download it to your computer, typically in STL format. Ensure that the model is compatible with your 3D printer’s build size and capabilities.
Preparing the 3D Model for Printing
After downloading, the next step is to prepare the model for printing. This involves importing the model into slicing software like Cura or PrusaSlicer and orienting it for optimal printing. You may need to adjust the scale and position to fit your printer’s bed.
Configuring Slicing Settings
Configuring the slicing settings is crucial for a successful print. This includes setting the ideal temperature for your filament, layer height, infill percentage, and print speed. A common layer height is 0.2mm, and an infill percentage of 15% to 20% is recommended for a balance between strength and material usage. The print speed often recommended is around 50mm/s.
Starting the Print and Post-Processing
Once the settings are configured, save the file to an SD card or send it directly to your 3D printer. Monitor the print closely. After printing, remove the model from the bed and remove any support structures. Post-processing may include sanding to smooth out rough areas, and you can add primer and paint for a more finished look.
Sanding and Finishing Techniques
Sanding is a key step in post-processing. Start with rough-grit sandpaper to remove large bumps, then switch to finer-grit sandpaper for smoothing. Use a sanding sponge or sticks for hard-to-reach areas. After sanding, wipe the model clean, polish it with a compound and a cloth, and apply a clear coat for protection.
Q&A: Common Questions About 3D Printing Welding Helmet Fans
Q: What materials are best for 3D printing welding helmet fans? A: PLA and ABS are popular choices. PLA is easier to work with, while ABS offers higher heat resistance, which might be beneficial near welding equipment.
Q: How long does it take to 3D print a welding helmet fan? A: The time can vary based on the model complexity and printer settings. It could range from a few hours to over a day for intricate designs.
Q: Can I modify a 3D model to better fit my helmet? A: Yes, you can use CAD software like Fusion 360, Tinkercad, or Blender to edit existing models or create a custom design based on your helmet’s dimensions.
Q: Is it necessary to use supports when 3D printing helmet fans? A: It depends on the design. If the model has overhangs or complex geometries, supports might be required to prevent sagging or warping during printing.
Q: How do I ensure the fan fits securely on the helmet? A: Accurate measurements and careful model preparation are key. Additionally, consider printing test pieces to check the fit before printing the entire model.
In conclusion, 3D printing welding helmet fans is a practical and customizable solution for welders. By following these guidelines and tips, you can create a fan that not only enhances your welding experience but also reflects your personal needs and style. Remember, the key to a successful 3D print lies in careful planning, precise settings, and patient post-processing.