 Substitute Soul Reaper Ear Saver
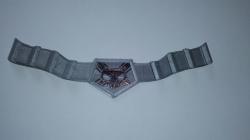 Substitute Soul Reaper Ear Saver
 Substitute Soul Reaper Ear Saver
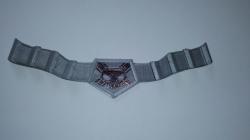 Substitute Soul Reaper Ear Saver
Understanding the Substitute Soul Reaper Badge
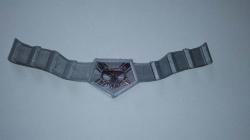
The Substitute Soul Reaper Badge is a significant artifact in the “Bleach” anime series. It’s provided to substitute soul reapers and serves as a means for the captains to monitor and control the powers of these new Shinigami. The badge’s design is intricate and holds a special place in the hearts of anime fans, making it a popular choice for 3D printing projects.
Finding 3D Models Online
The internet is a treasure trove of 3D models for printing the Substitute Soul Reaper Badge. Websites like STLFinder, Sketchfab, and CGTrader offer a range of models in various file formats such as .stl, .obj, .fbx, and more. These sites provide an extensive library of models, catering to different skill levels and printing capabilities. For instance, on CGTrader, you can find the Bleach Substitute Soul Reaper Badge model available in multiple formats, including .max, .fbx, .obj, .3ds, .stl, and .dae.
3D Printing Tips and Techniques
When it comes to 3D printing these models, several tips and techniques can enhance the final product:
- Selecting the Right Material: Depending on the desired finish and durability, you can choose from materials like PLA, ABS, or resin. Each material has its pros and cons, so consider the badge’s intended use and display.
- Printing Settings: Optimal layer height and infill density are crucial. A layer height of around 0.2mm is a good starting point for detailed prints. The infill density should be balanced to ensure the badge is sturdy but not unnecessarily heavy.
- Post-Processing: After printing, you might need to sand the surface for a smoother finish. Painting and varnishing can also bring the badge to life, highlighting its intricate details.
Frequently Asked Questions
Q: What is the best file format for 3D printing a Substitute Soul Reaper Badge?
A: The .stl format is widely used and compatible with most 3D printers. However, formats like .obj or .fbx can offer more detailed models, especially if you’re using a high-end 3D printer.
Q: Can I modify the 3D model of the badge before printing?
A: Absolutely! Most 3D modeling software allows you to tweak and customize models. You can scale the badge to different sizes or even add personalized details.
Q: How long does it take to 3D print a Substitute Soul Reaper Badge?
A: The printing time varies based on the size of the badge and the settings of your 3D printer. Smaller badges can take a few hours, while larger or more detailed prints might need overnight printing.
Engaging with the community of 3D printing enthusiasts can also provide valuable insights and inspiration. Whether you’re a seasoned pro or a beginner, the journey of bringing the Substitute Soul Reaper Badge to life through 3D printing is a rewarding experience filled with learning and creativity.