 Ikea Lack 3D Printer Enclosure
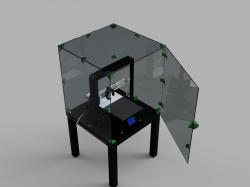 3D Printer enclosure IKEA LACK table
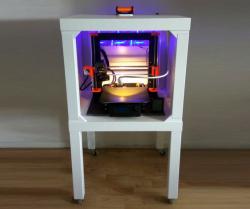 Ventilated Ikea LACK 3D Printer Enclosure
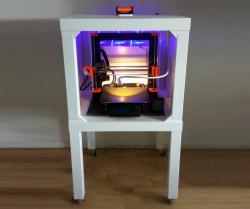 Ventilated Ikea LACK 3D Printer Enclosure
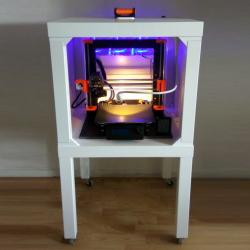 Ventilated Ikea LACK 3D Printer Enclosure
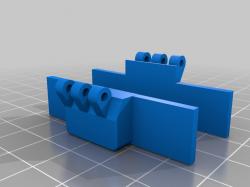
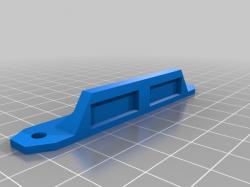 Ender 3 - Ikea Lack Enclosure - Individual stl models
Understanding the IKEA Lack Enclosure
The IKEA Lack table is a popular choice for 3D printer enclosures due to its affordability and suitable dimensions. The enclosure, essentially built by stacking and modifying these tables, provides a stable and enclosed environment for 3D printers. This setup improves printing quality by maintaining a consistent temperature, reducing noise, and protecting the printer from dust and external interference.
Exploring 3D Models for IKEA Lack Enclosures
A wealth of 3D models for IKEA Lack enclosures is available online, with platforms like Thingiverse and Cults offering free downloadable designs. These models range from basic frame structures to more complex designs incorporating features like LED lighting, magnetic handles, and specialized mounts for Raspberry Pi cameras. The designs are often customizable and can be modified to suit different printer models, such as the Creality Ender 3 or Prusa i3.
Top Modifications and Upgrades
For those looking to enhance their IKEA Lack enclosures, there are numerous mods and upgrades available. Some popular modifications include adding plexiglass panels for visibility, installing LED lighting for better visibility inside the enclosure, and incorporating cable management solutions to keep the setup tidy. Other upgrades might involve thermal insulation to better maintain temperature or adding handles and hinges for easier access.
3D Printing Tips for IKEA Lack Enclosure Parts
When 3D printing parts for your IKEA Lack enclosure, consider the following tips:
- Material Choice: Use materials like PLA or PETG for their ease of printing and durability.
- Print Settings: Optimize your printer settings for the specific part you’re printing. For structural components, a higher infill percentage can add strength.
- Post-Processing: Clean up any stringing or imperfections post-printing to ensure a smooth assembly process.
Q&A on IKEA Lack Enclosures
Q: Can I customize the IKEA Lack enclosure for my specific printer model? A: Yes, many of the available 3D models are customizable to fit different printer models.
Q: Do I need advanced 3D printing skills to create these enclosure parts? A: Not necessarily. Many designs are beginner-friendly, but some more complex modifications might require intermediate skills.
Q: How long does it take to print all the necessary parts for the enclosure? A: The printing time can vary based on the complexity of the parts and your printer’s settings. Some users have reported printing times ranging from 40 to over 100 hours for all parts.
Remember, while 3D printing your own IKEA Lack enclosure parts can be a rewarding DIY project, it’s important to approach it with patience and a willingness to troubleshoot and iterate on your designs.