 Alex Terrible Mask Kid of Darkness 3D print model
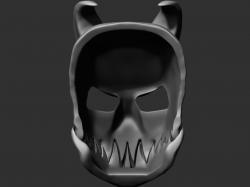 Kid of darkness - alex terrible mask 3D print model
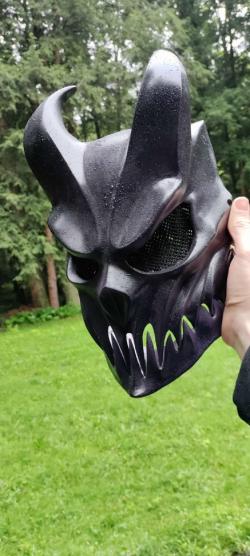 Slaughter to prevail / Alex Terrible Mask
  Slaughter to prevail / Alex Terrible Mask
 Slaughter to prevail / Alex Terrible Mask 2.1
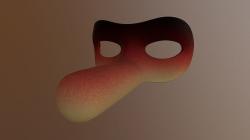 Alex DeLarge Droog Mask 3D model
3D Model Selection
Alex Terrible masks, inspired by the lead singer of the band Slaughter to Prevail, are popular among 3D printing enthusiasts. These masks are available on various platforms like MyMiniFactory, where they are offered for sale. These models often come in various formats, including STL and OBJ, which are widely used in 3D printing.
3D Printing Process
The printing process for an Alex Terrible mask can be challenging due to its size and detail. In many cases, the mask has to be printed in multiple parts and then assembled post-printing. This assembly might involve the use of pins or adhesives to join different pieces together. A common approach is to use a standard FDM (Fused Deposition Modeling) printer, which is a popular choice for home 3D printing projects.
Post-Processing
After printing, the mask usually requires several post-processing steps:
- Filling and Sanding: Using a filler, like wood filler, helps to smooth out the seams where the pieces are joined. Once the filler has dried, sanding is done starting with a coarser grit and moving to finer grits for a smooth finish. The choice of sandpaper might range from 120 to 1000 grit.
- Painting: The mask can be painted according to personal preference. Metallic spray paints, like gold or silver, can be used to give it an authentic metal-like appearance. It’s essential to apply multiple coats for even coverage and let each coat dry thoroughly before applying the next.
- Clear Coating: A clear coat is applied to protect the paint and give the mask a finished look. This also helps in adding a glossy or matte finish, depending on the chosen clear coat.
3D Printing Tips
- Model Selection: Choose a model that suits your printing capabilities. Be mindful of the model’s complexity and size.
- Printer Settings: Optimize your printer settings for the material you are using. This includes adjusting the print speed, temperature, and layer height.
- Assembly: Test fit the pieces before applying any adhesive or filler. This ensures that all parts align correctly.
Q&A
- What materials are best for printing an Alex Terrible mask?
- PLA or ABS plastics are commonly used for 3D printing masks due to their ease of use and finishing properties.
- Can I modify the 3D model before printing?
- Yes, you can modify the model using 3D modeling software, but ensure you have the necessary skills to do so without compromising the model’s integrity.
- How long does it take to print and assemble the mask?
- The printing time can vary based on the printer and settings used. Assembly and post-processing can take additional hours, especially if meticulous finishing is desired.
By following these steps and tips, enthusiasts can create their own Alex Terrible mask, a unique blend of art and technology. Remember, patience and attention to detail are key in achieving a high-quality finished product.